> ## Documentation Index
> Fetch the complete documentation index at: https://docs.sidecardata.com/llms.txt
> Use this file to discover all available pages before exploring further.
# Context Garage quickstart
> Create your first context repo, publish a version, and serve it to downstream tools
Use this guide to create a context repo from catalog assets, review the generated files, publish a version, and make it available to another tool.
## Before you start
You need:
* A Sidecar workspace with Context Garage enabled
* A connected warehouse with catalog assets synced into Sidecar
* Permission to create and publish context repos
## Create a context repo
In Sidecar, open **Context Garage** from the main navigation.
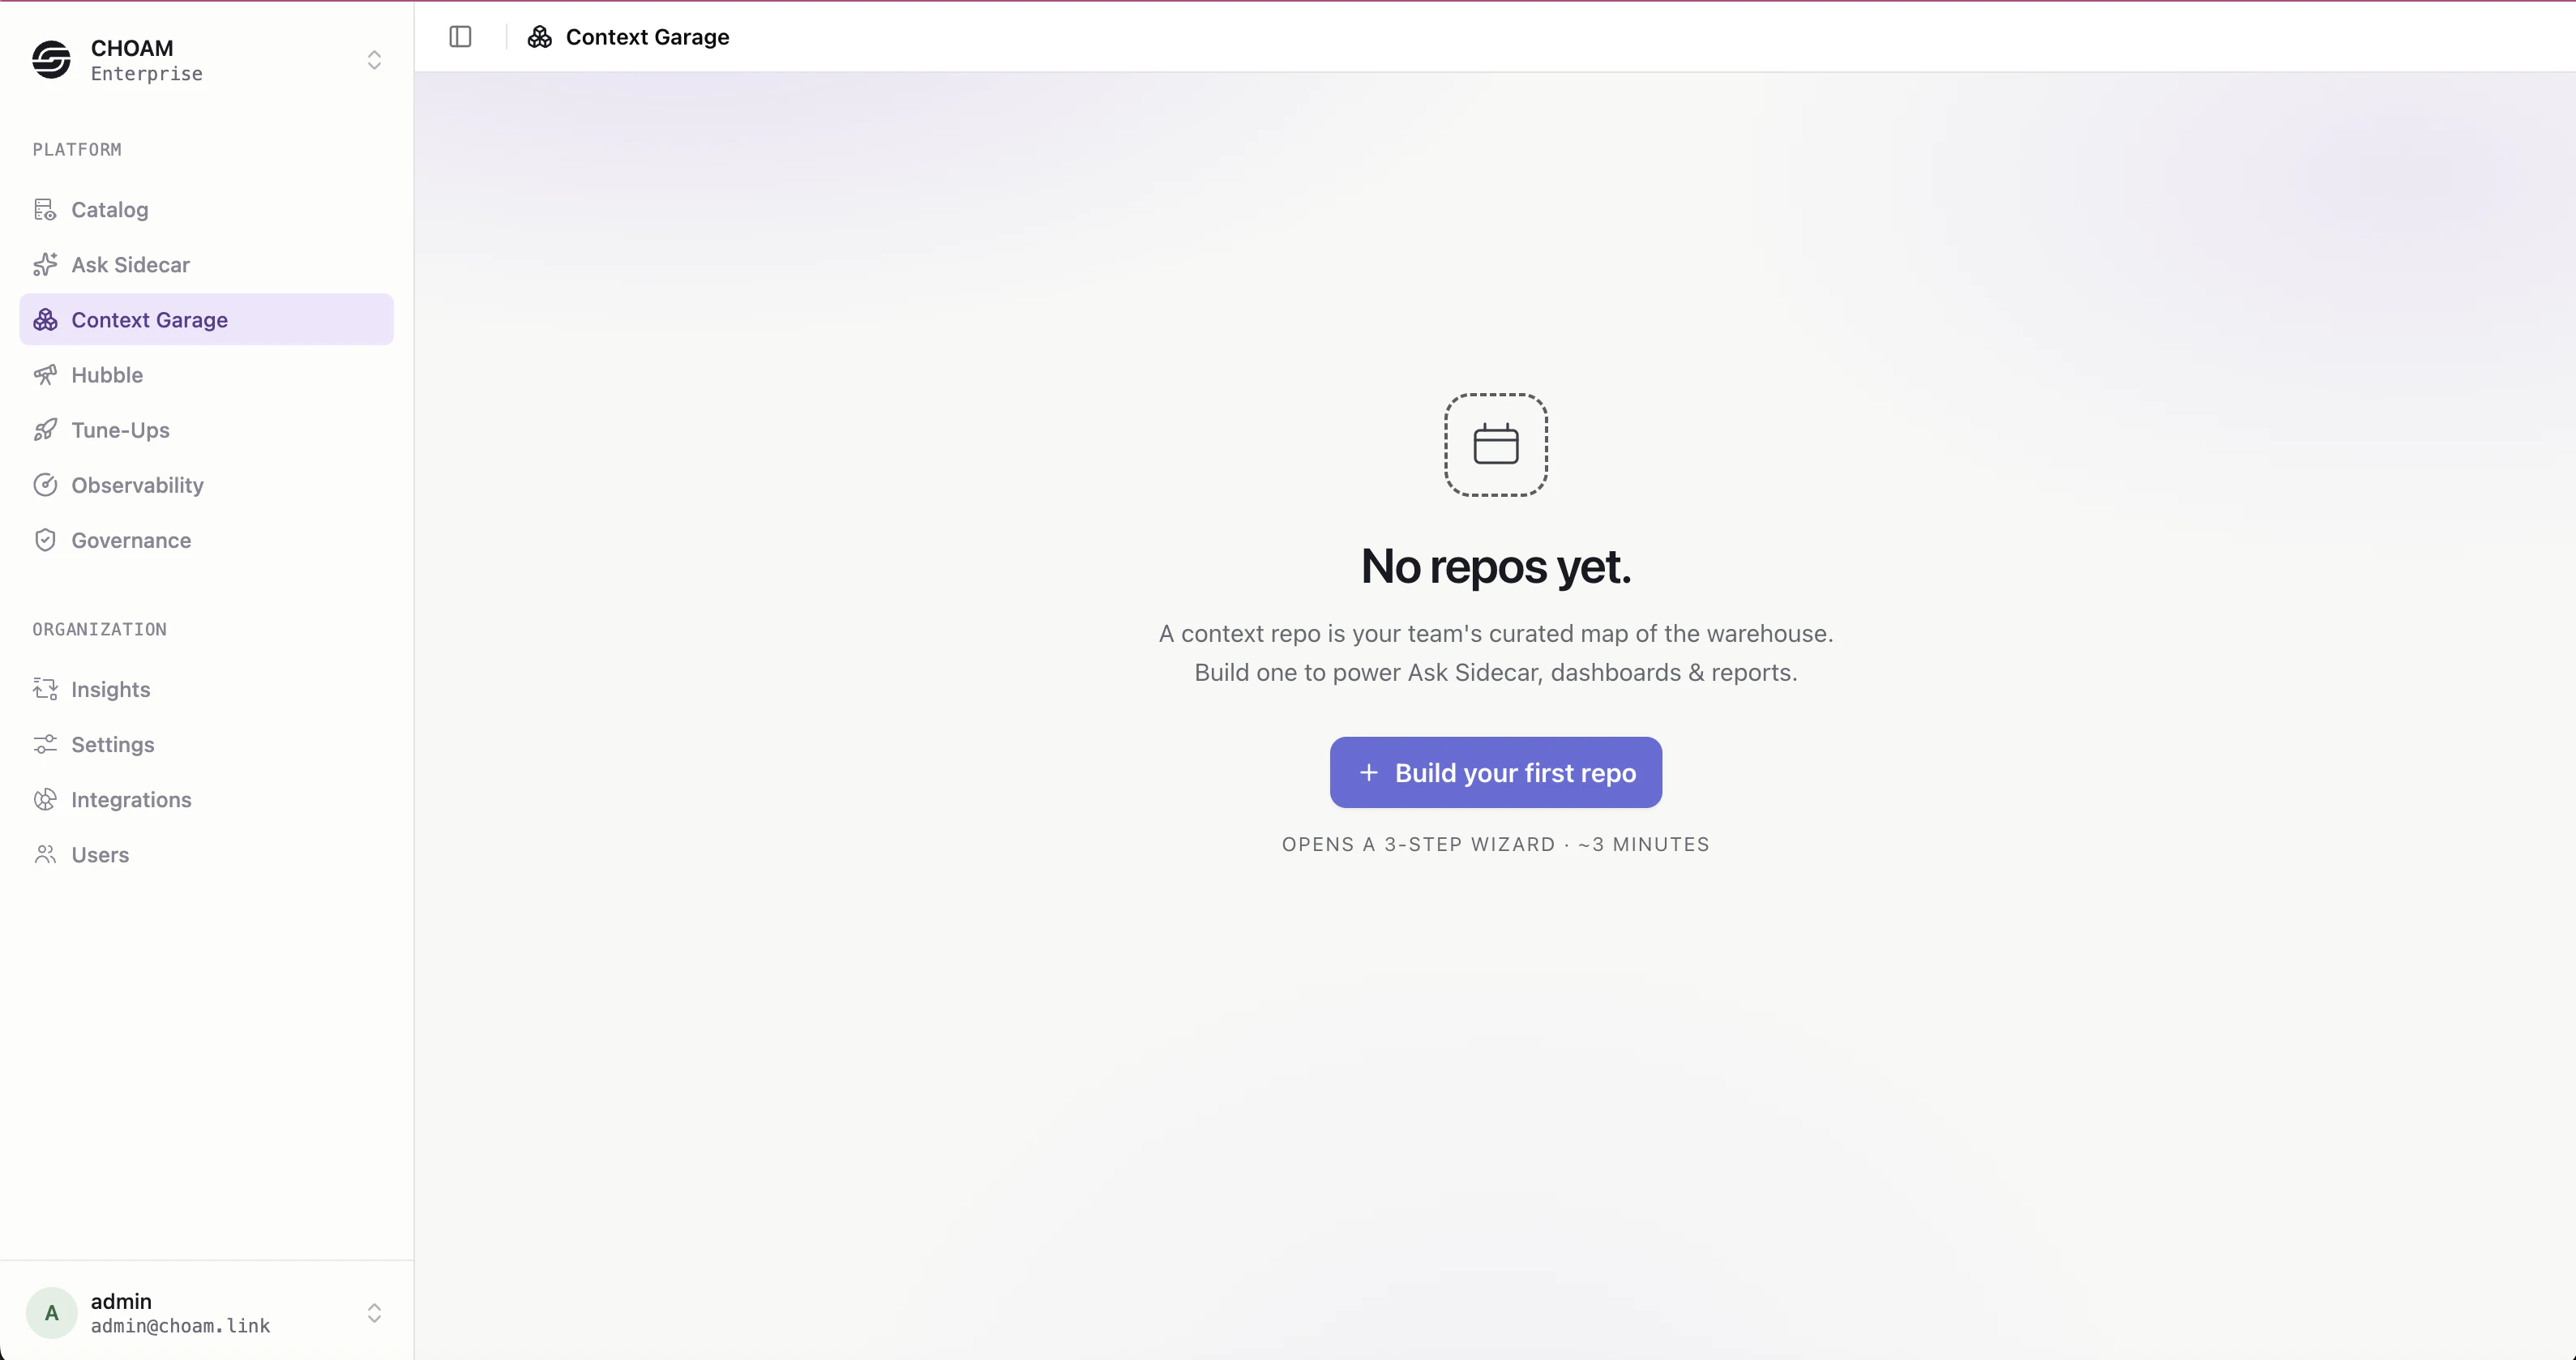 Click **Build your first repo**. Sidecar opens the **Build a context repo** wizard.
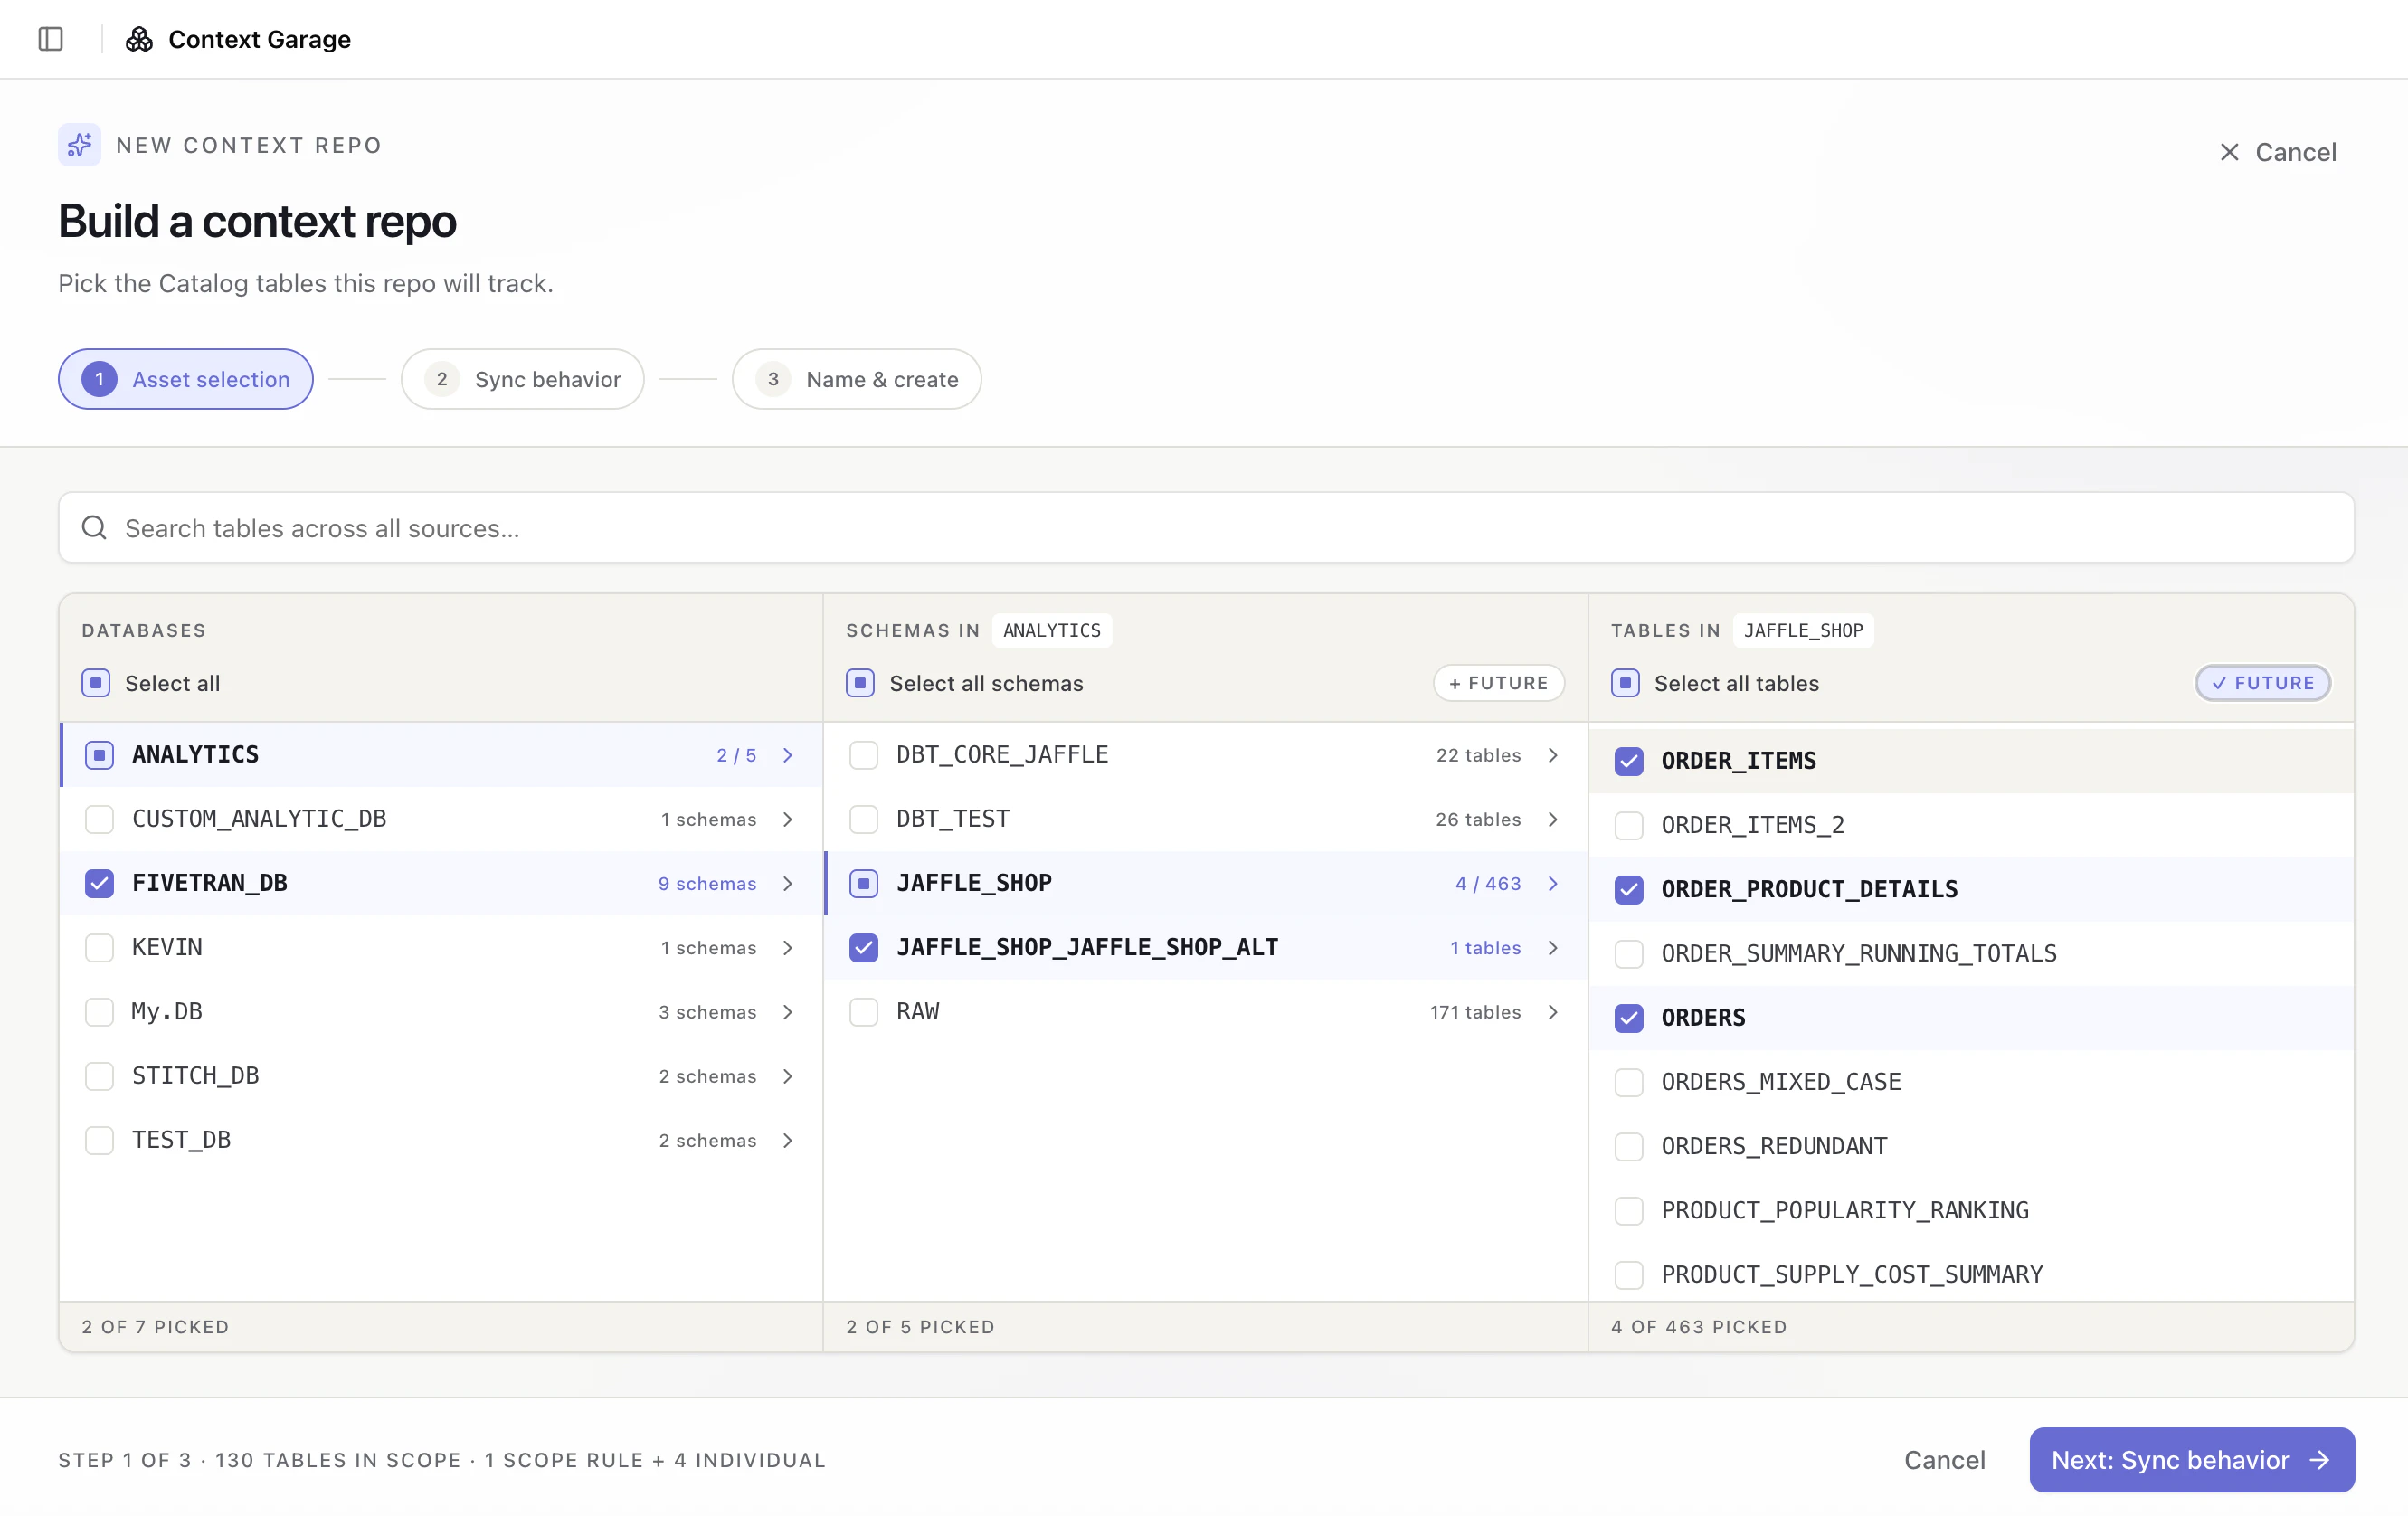
Choose the Catalog tables this repo should track. You can select individual tables or select a broader database or schema scope.
To include matching tables that are discovered later, enable **Future** for the selected scope.
Click **Build your first repo**. Sidecar opens the **Build a context repo** wizard.
Choose the Catalog tables this repo should track. You can select individual tables or select a broader database or schema scope.
To include matching tables that are discovered later, enable **Future** for the selected scope.
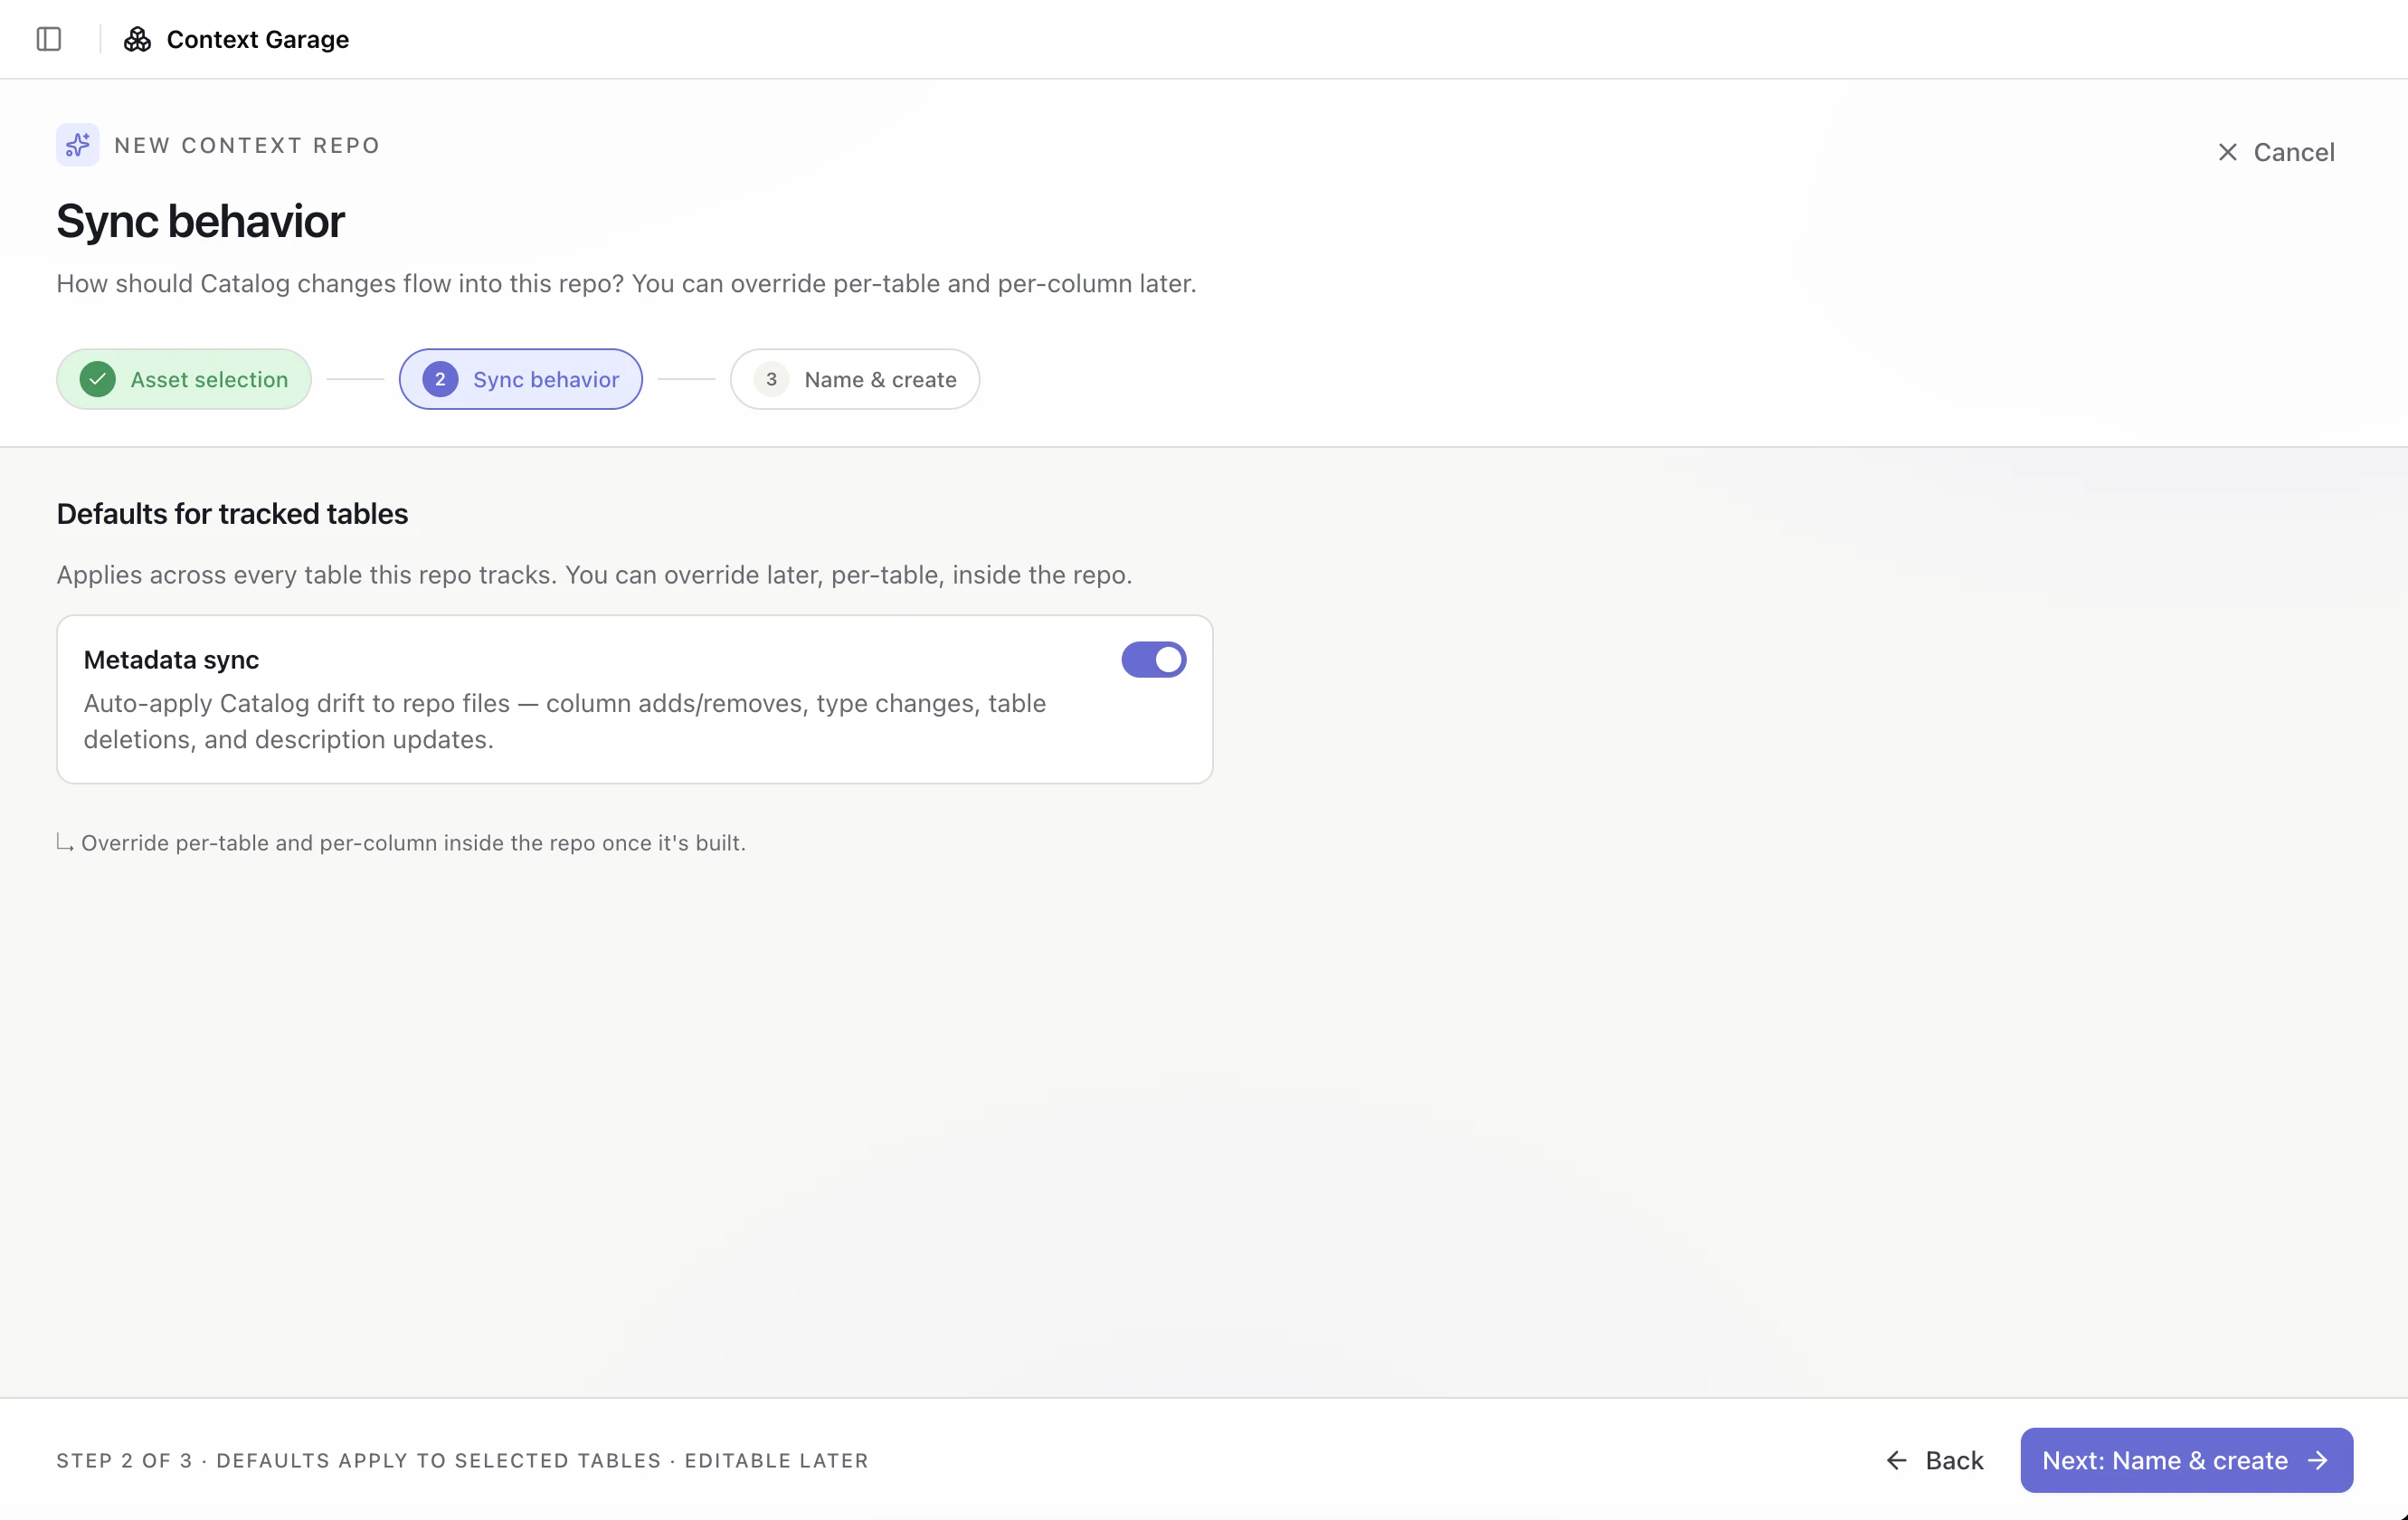
 Click **Next: Sync behavior**. Choose whether Sidecar should auto-apply Catalog drift to tracked repo files.
When **Metadata sync** is enabled, Sidecar can update the draft for column adds and removals, type changes, table deletions, and description updates. You can override this behavior later inside the repo.
Click **Next: Sync behavior**. Choose whether Sidecar should auto-apply Catalog drift to tracked repo files.
When **Metadata sync** is enabled, Sidecar can update the draft for column adds and removals, type changes, table deletions, and description updates. You can override this behavior later inside the repo.
 Click **Next: Name & create**. Enter a repo name and optional description.
The description appears on the repo card and inside the Build view.
Click **Next: Name & create**. Enter a repo name and optional description.
The description appears on the repo card and inside the Build view.
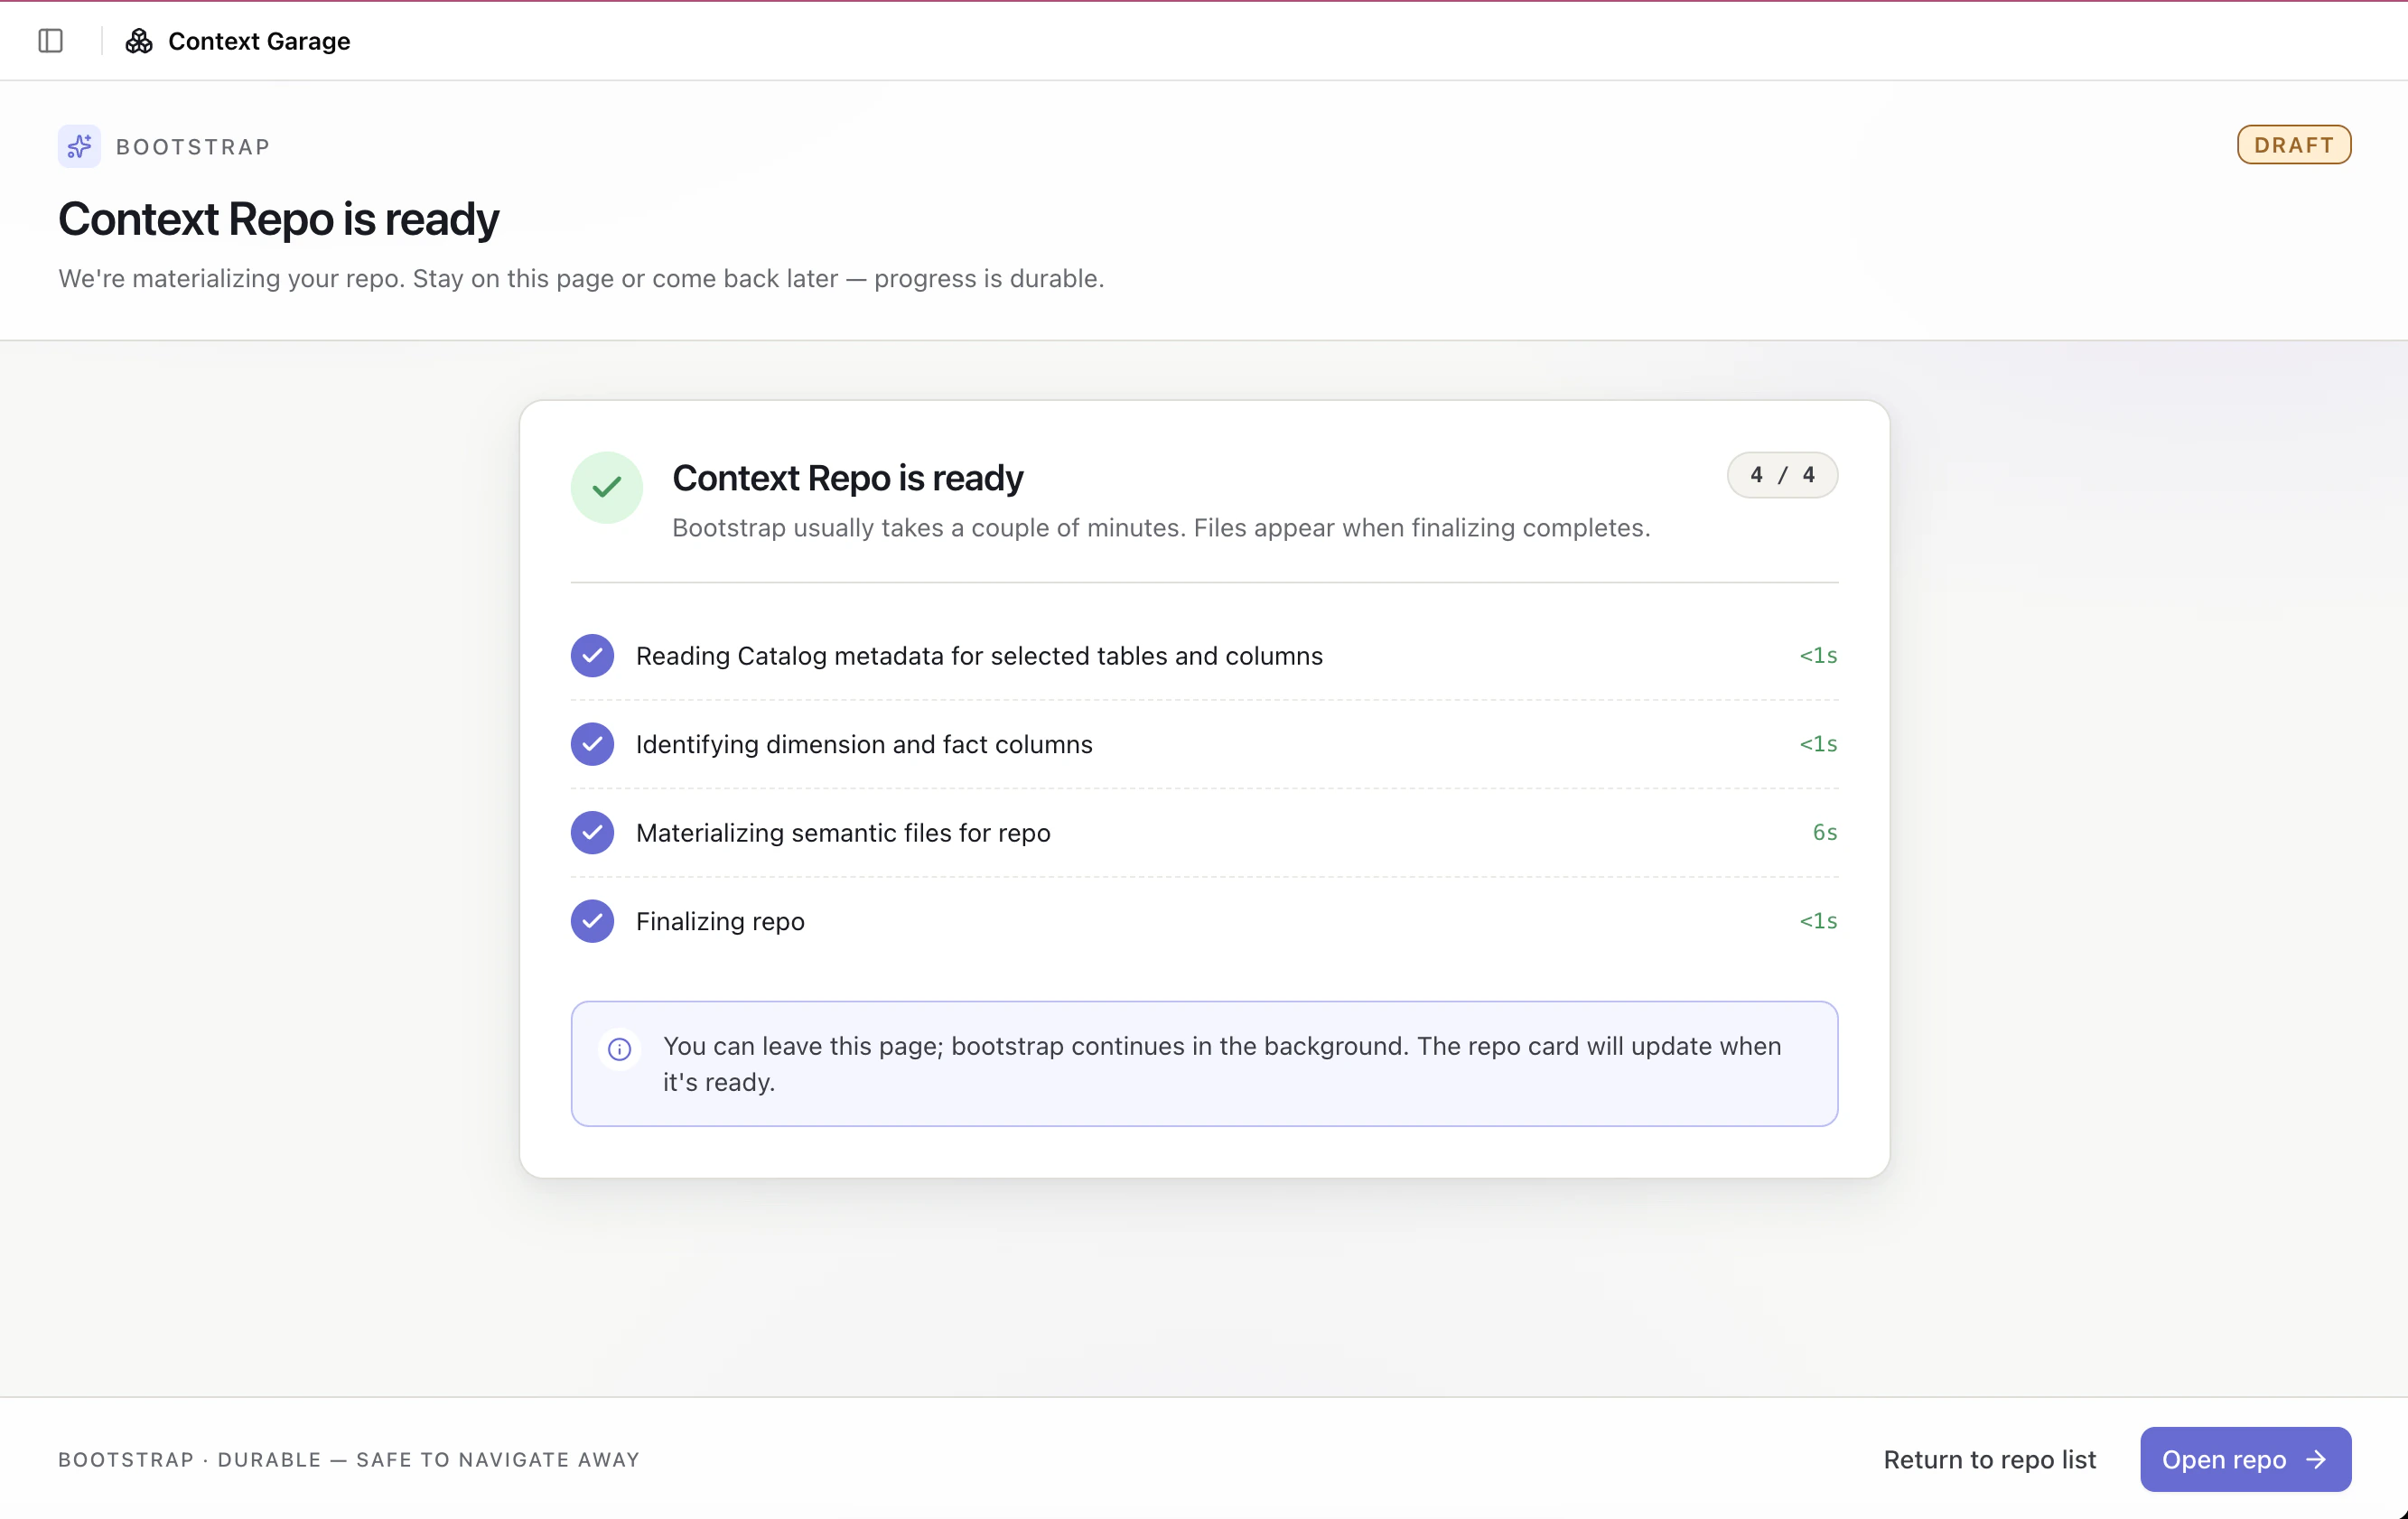
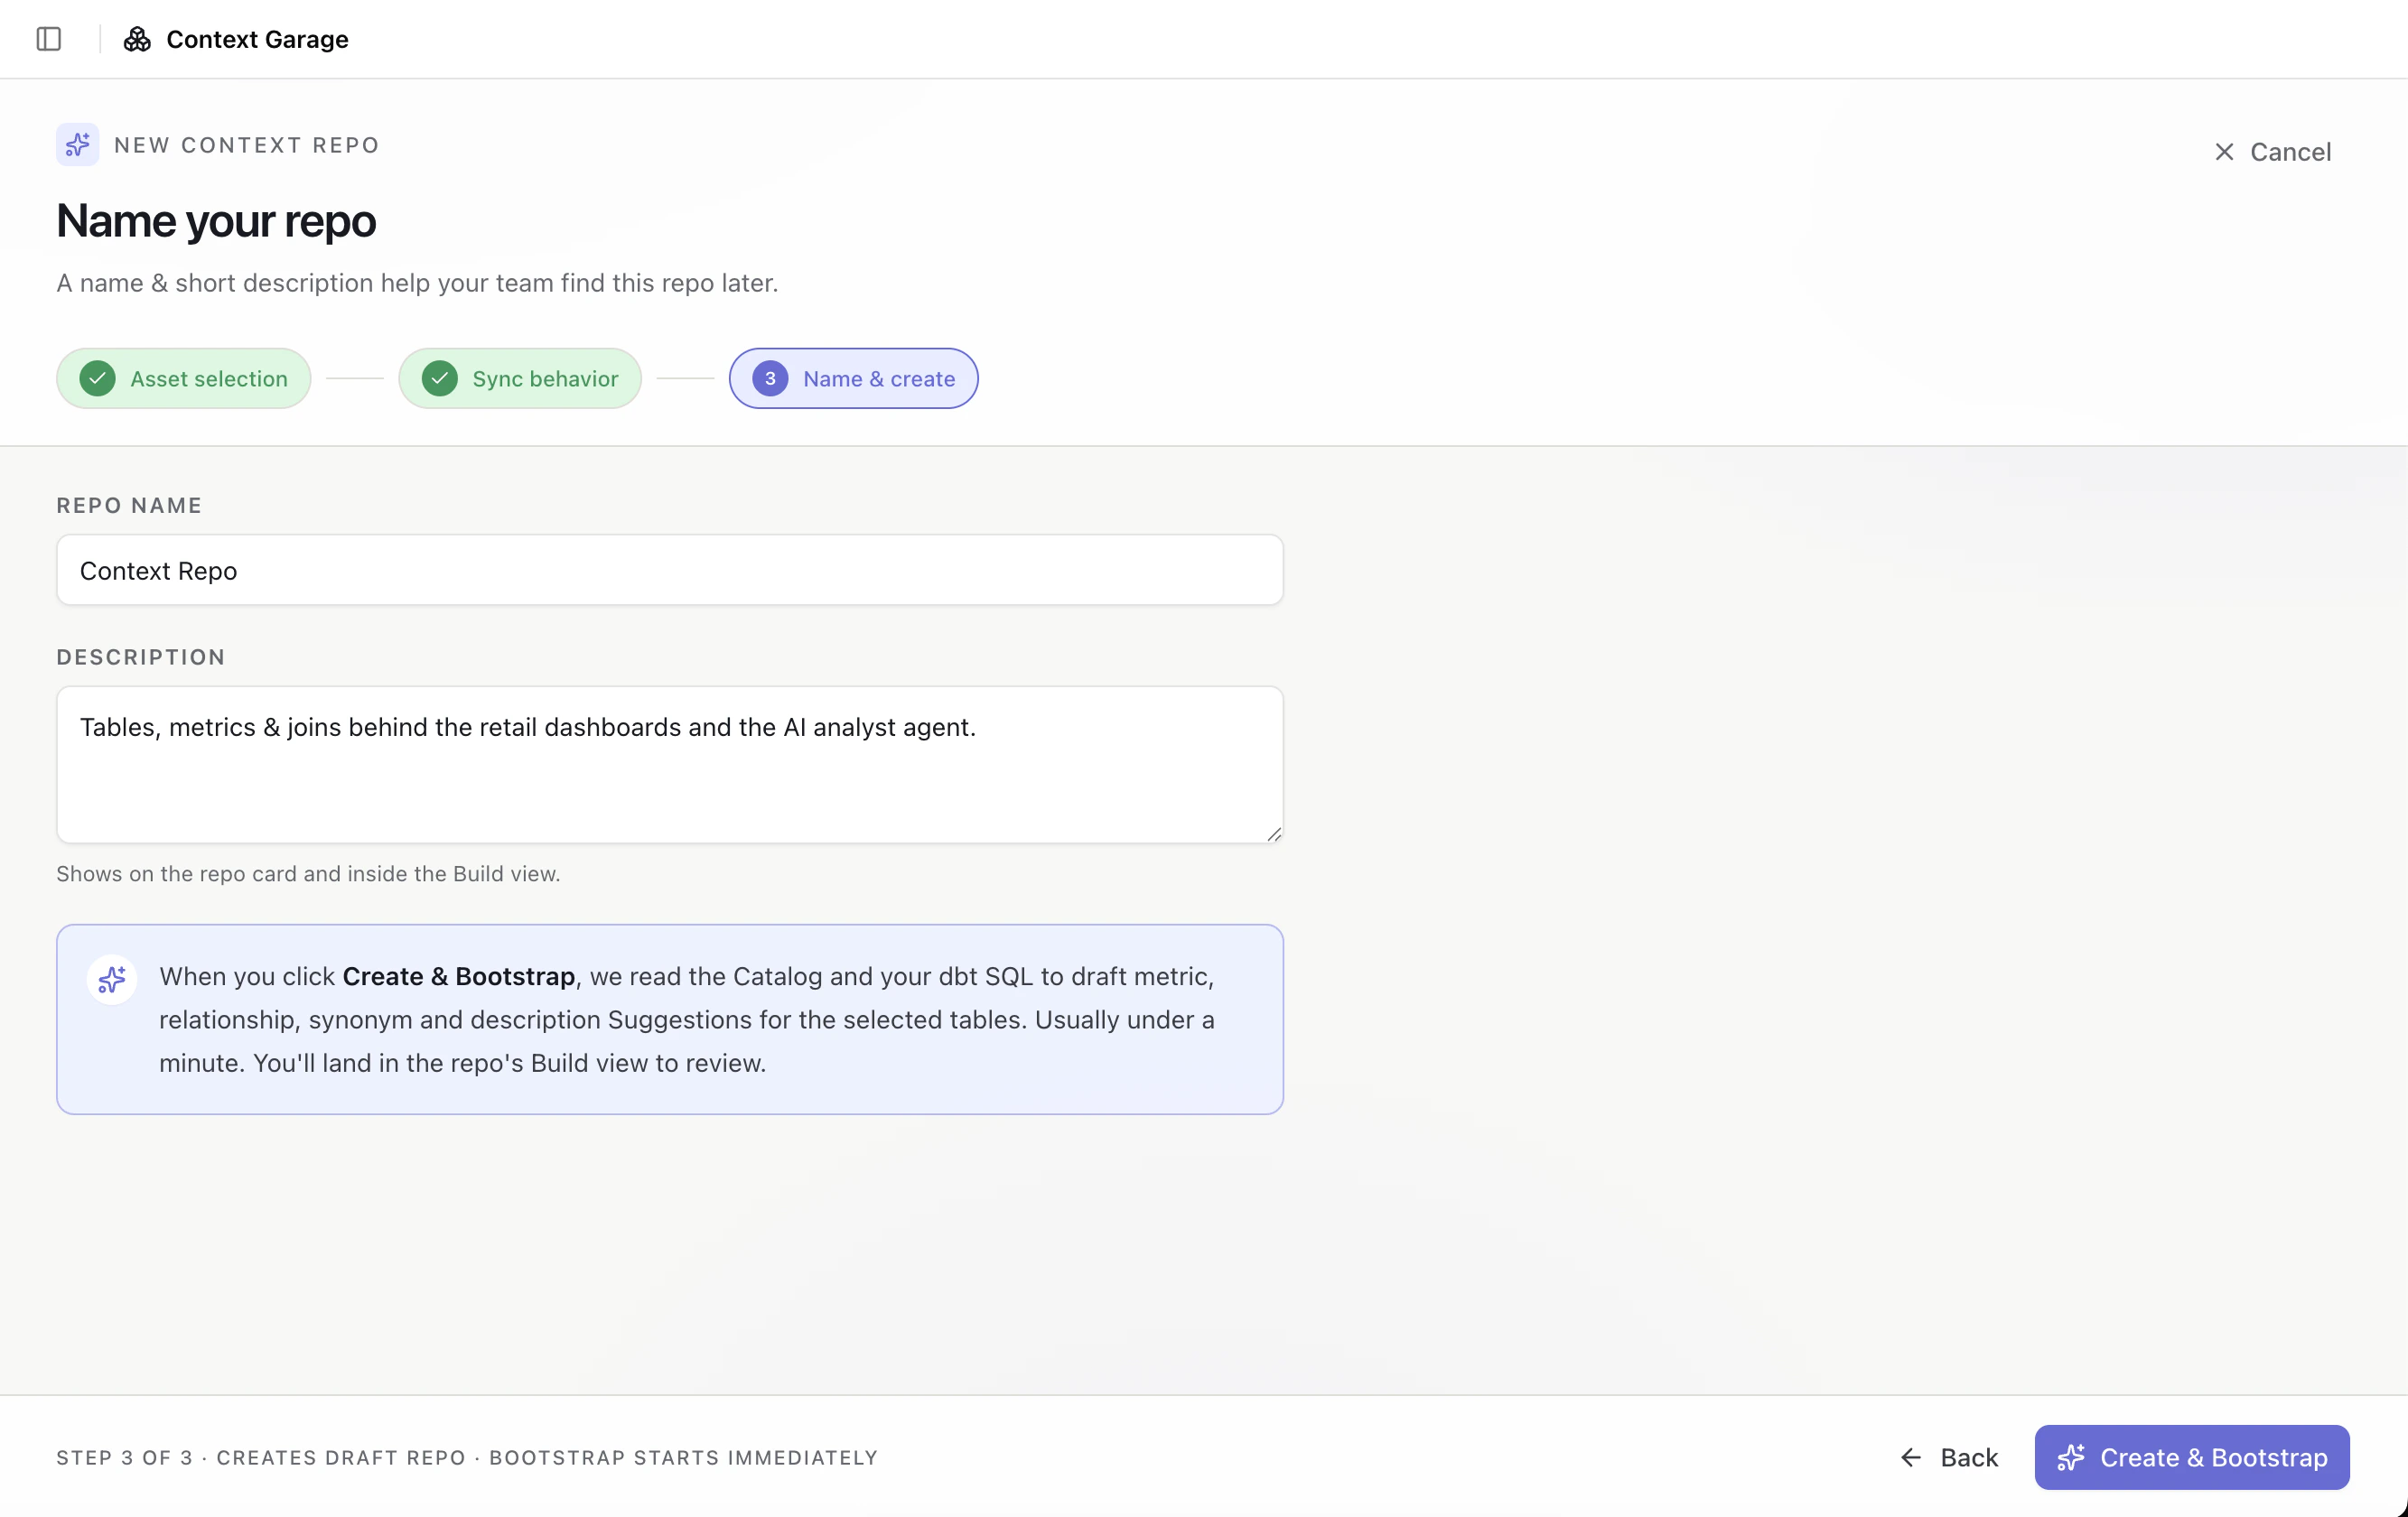 Click **Create & Bootstrap**. Sidecar reads the Catalog and available dbt SQL, generates the initial repo files, and creates a draft repo.
Bootstrap is durable. You can leave the page and return later while it runs.
Click **Create & Bootstrap**. Sidecar reads the Catalog and available dbt SQL, generates the initial repo files, and creates a draft repo.
Bootstrap is durable. You can leave the page and return later while it runs.
 ## Review and edit files
Use the file navigator to open generated files and review the YAML.
Common first edits include:
* Update dataset and field descriptions
* Mark important fields as dimensions, facts, or time dimensions
* Add relationships between datasets
* Add shared metrics
## Review and edit files
Use the file navigator to open generated files and review the YAML.
Common first edits include:
* Update dataset and field descriptions
* Mark important fields as dimensions, facts, or time dimensions
* Add relationships between datasets
* Add shared metrics
 ## Publish a version
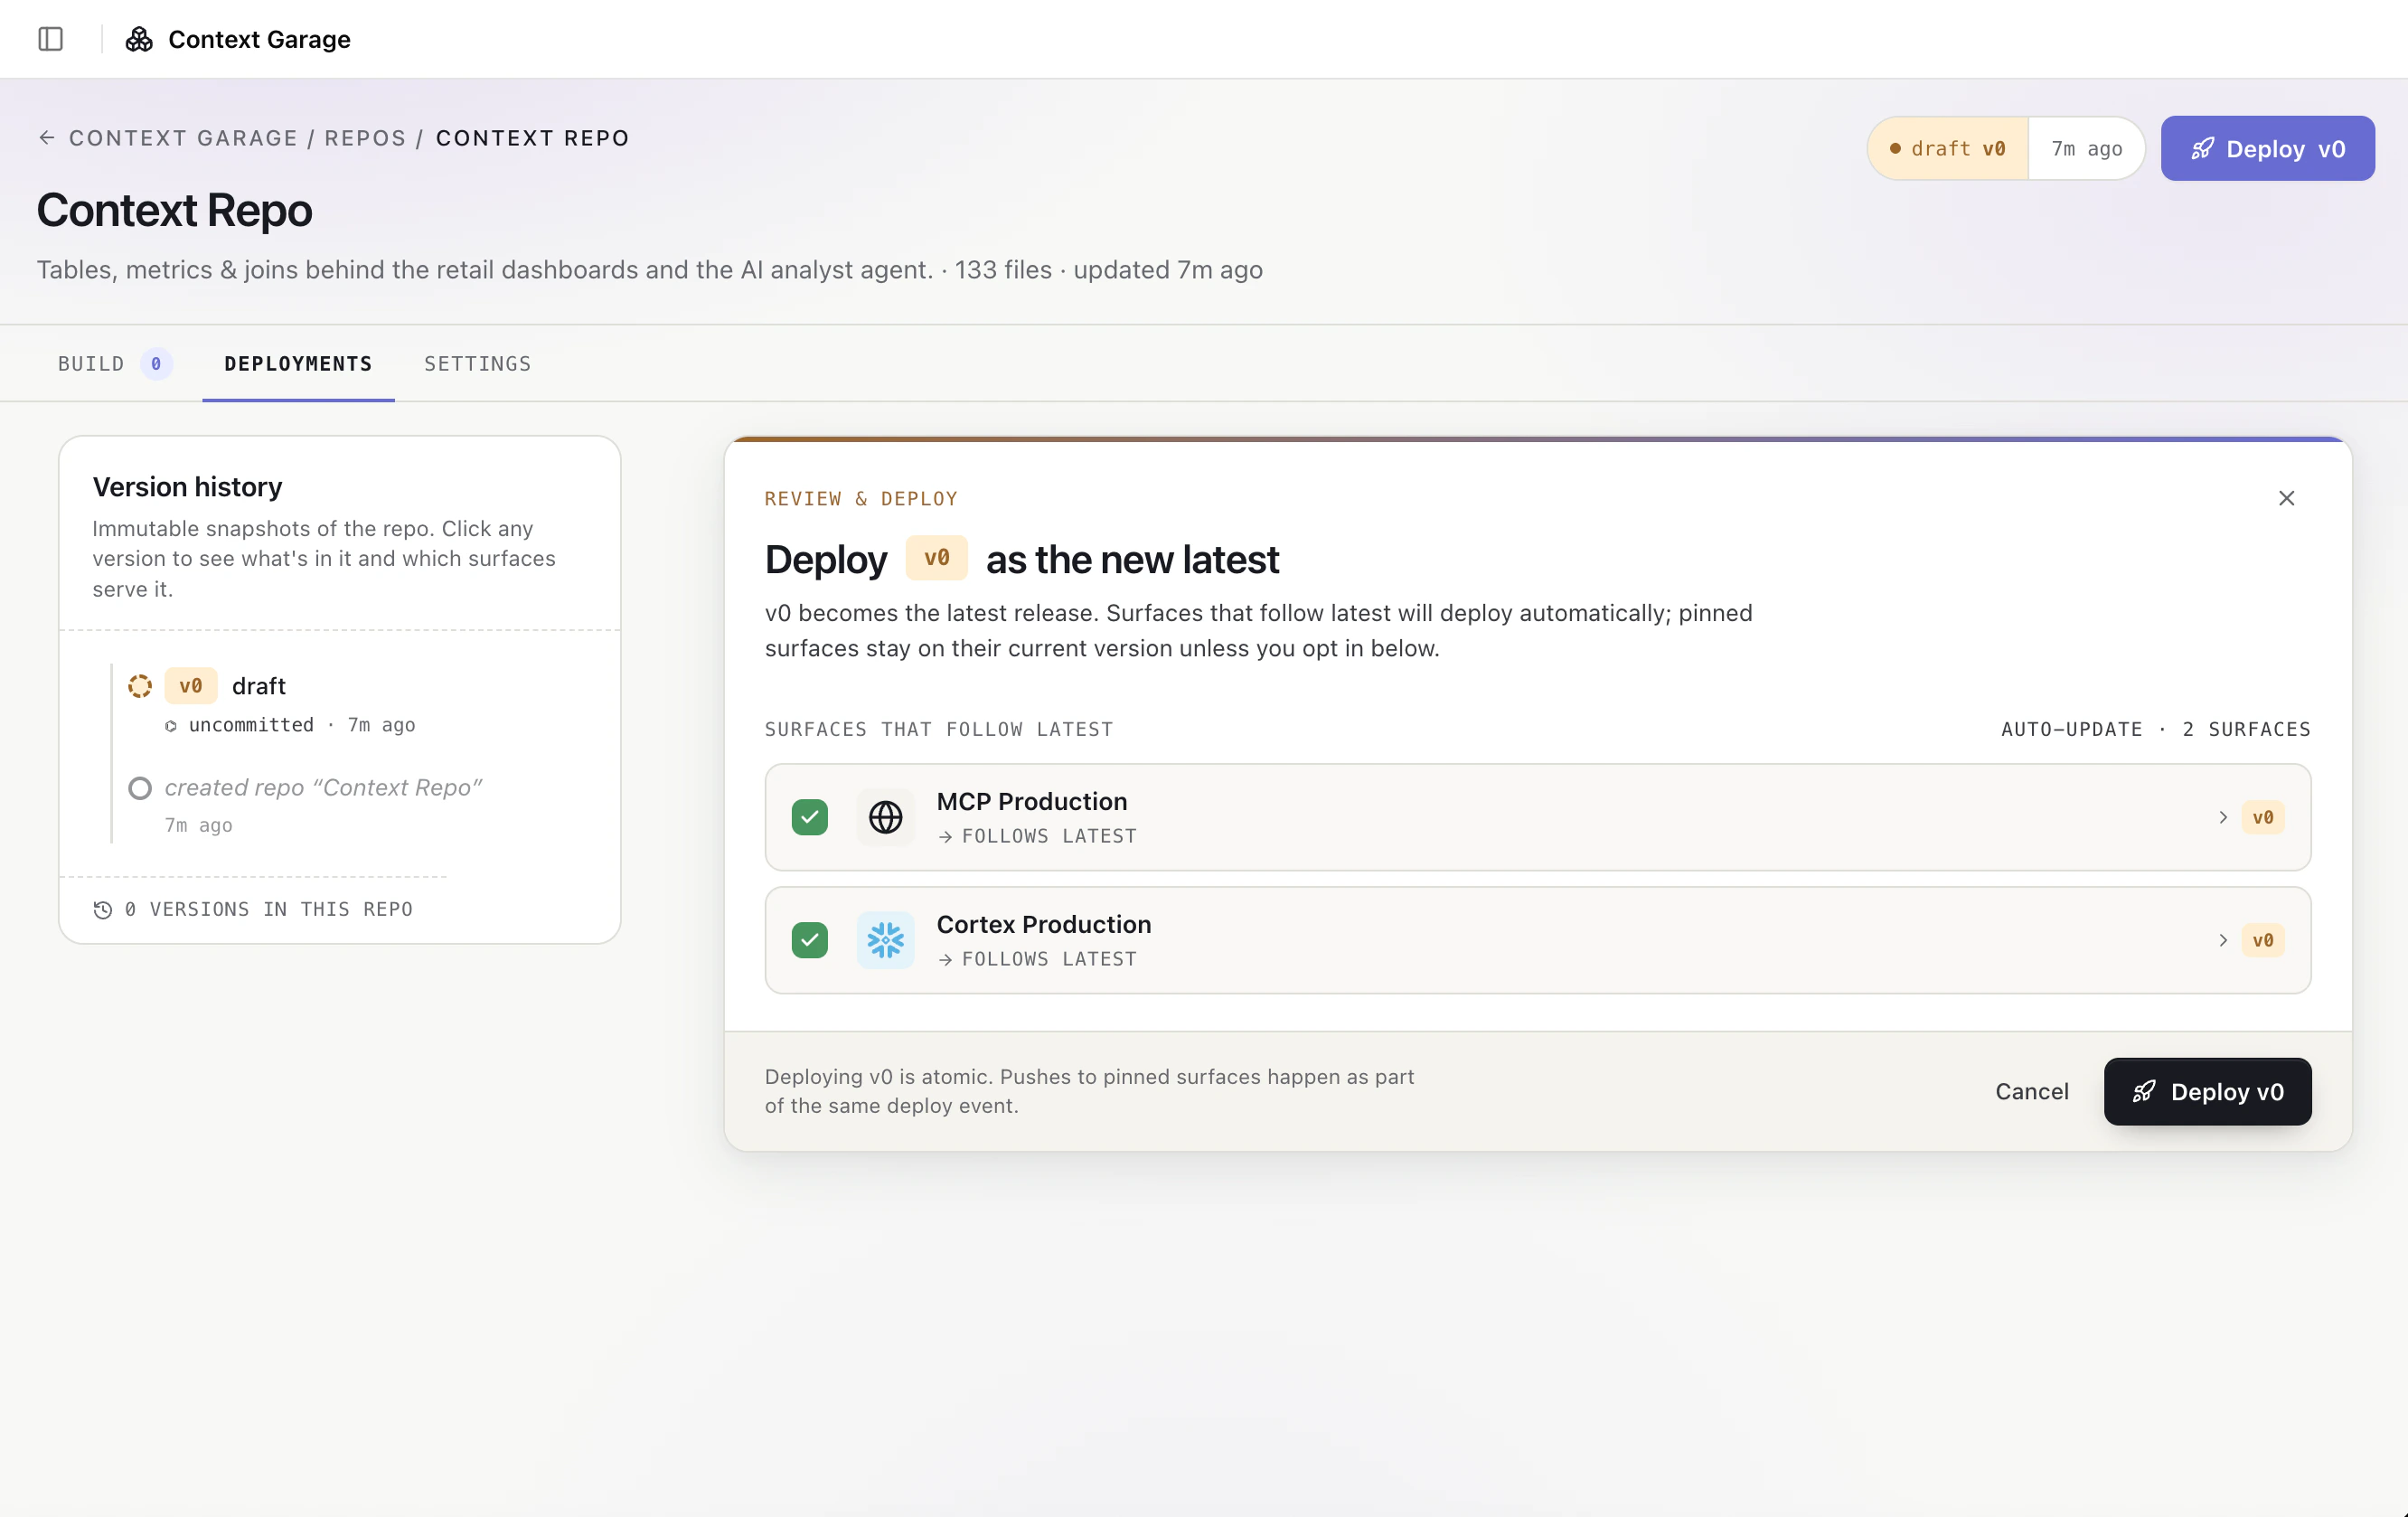
When the draft is ready, publish it.
Click **Publish** from the repo editor.
Review the generated OSI and target-specific artifacts, such as Cortex YAML.
Add an optional message and click **Publish version**. Sidecar creates the next immutable version, such as `v0` or `v1`.
## Publish a version
When the draft is ready, publish it.
Click **Publish** from the repo editor.
Review the generated OSI and target-specific artifacts, such as Cortex YAML.
Add an optional message and click **Publish version**. Sidecar creates the next immutable version, such as `v0` or `v1`.
 ## Serve the published version
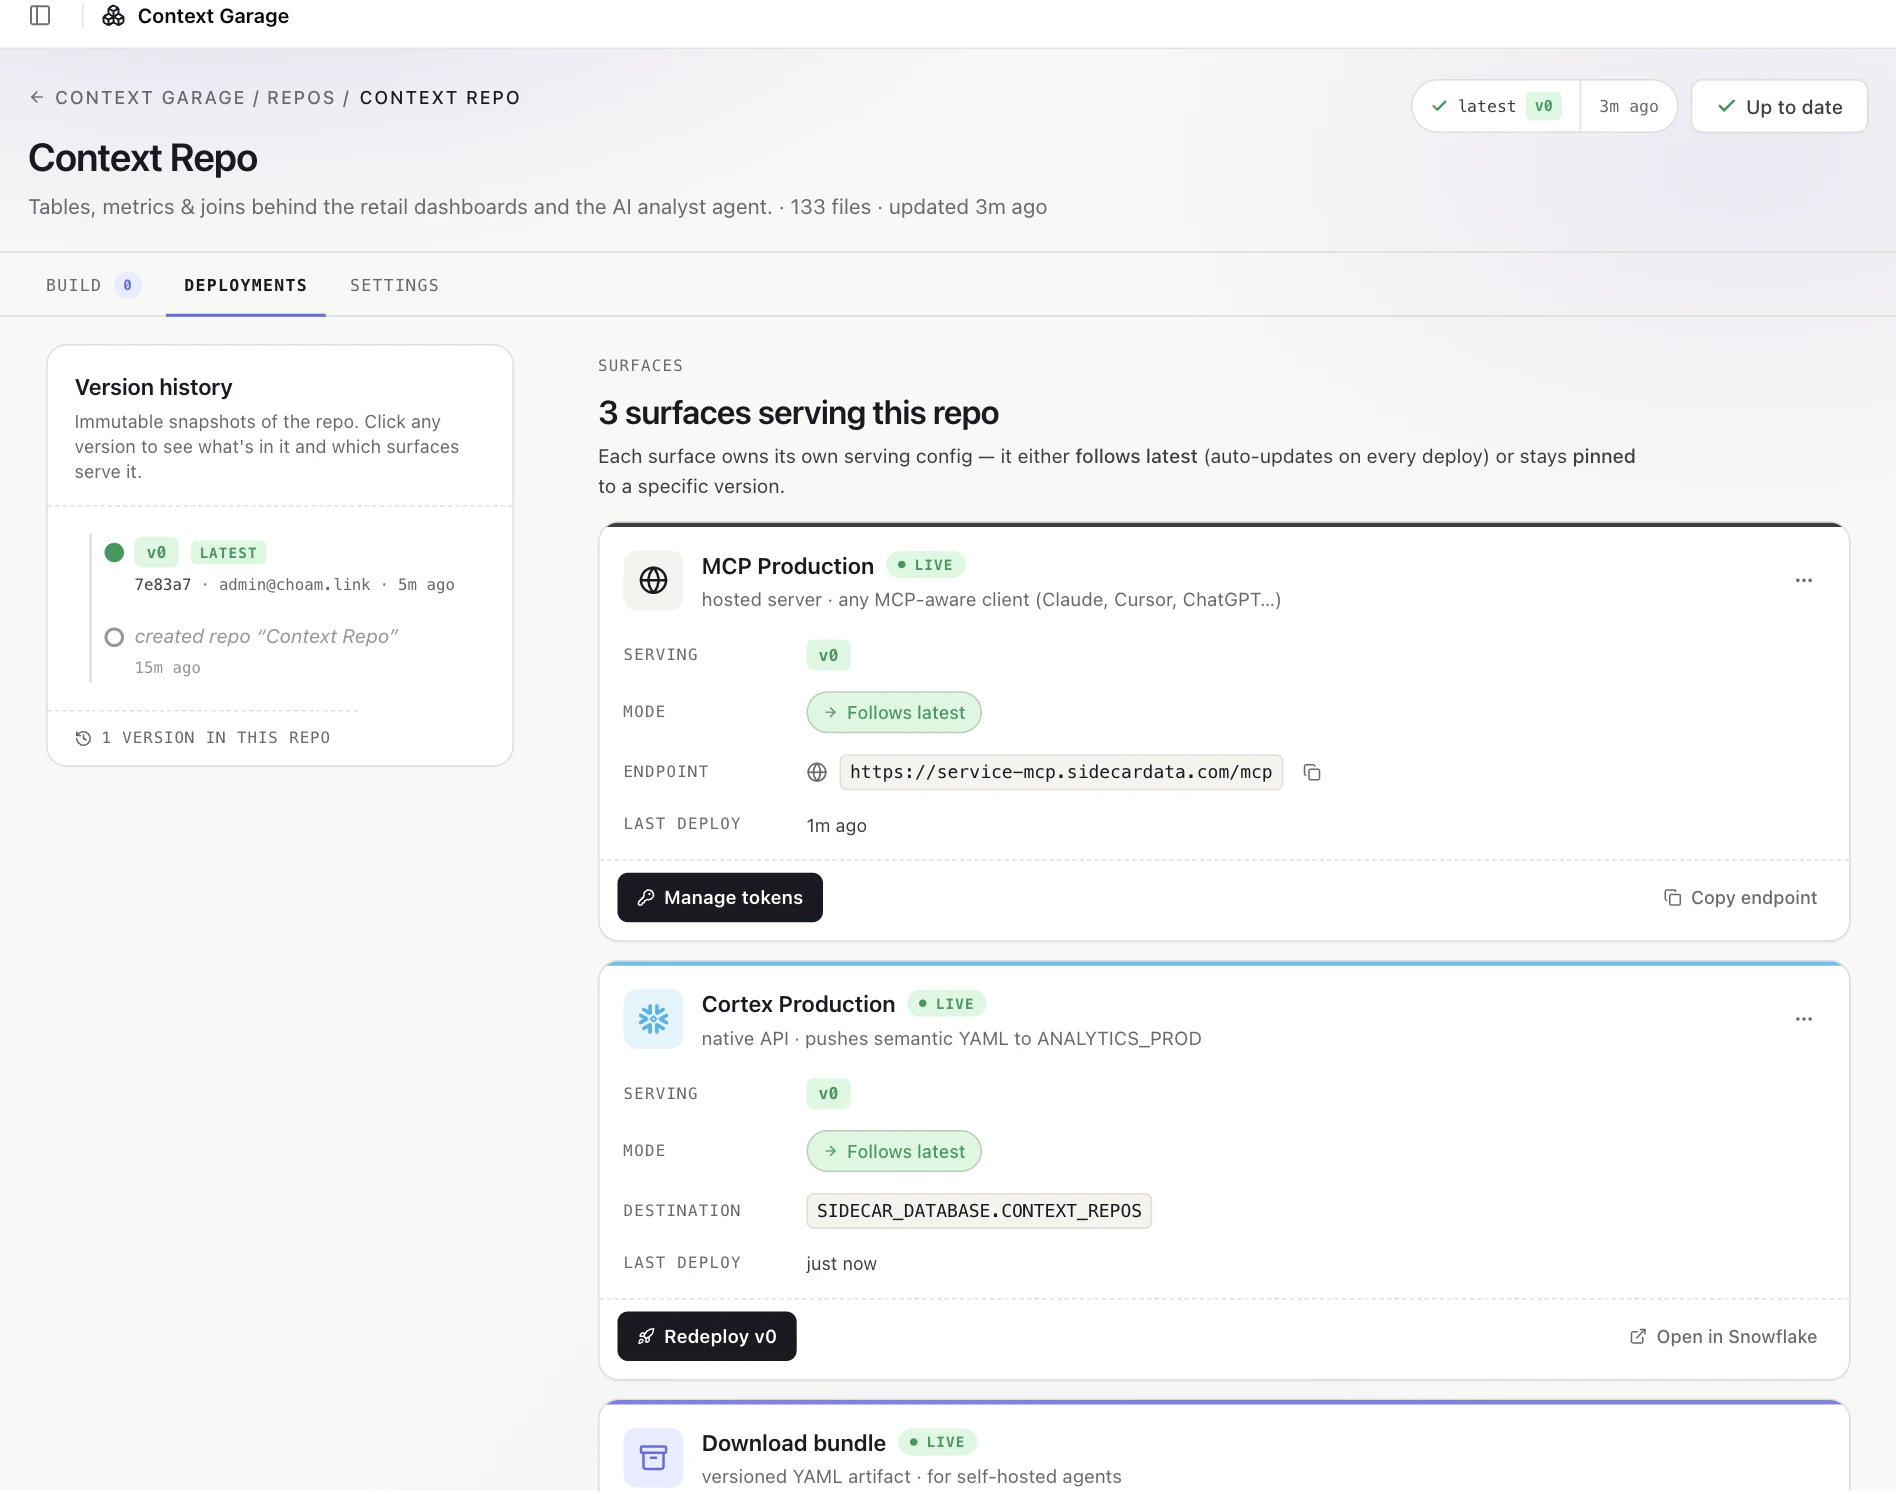
After publishing, choose how to use the version.
Download the generated OSI or target-specific YAML for a self-managed
workflow.
Create an MCP deploy surface and generate a token for AI tools that support
MCP.
Create a Cortex deploy surface to push the generated semantic view YAML to
Snowflake.
Configure a deploy surface to track the latest published version so new
versions are served automatically.
## Serve the published version
After publishing, choose how to use the version.
Download the generated OSI or target-specific YAML for a self-managed
workflow.
Create an MCP deploy surface and generate a token for AI tools that support
MCP.
Create a Cortex deploy surface to push the generated semantic view YAML to
Snowflake.
Configure a deploy surface to track the latest published version so new
versions are served automatically.
 ## Keep the repo current
As your catalog changes, return to the asset selector to update what the repo tracks.
When you save selection changes:
* Newly selected tables are added to the draft
* Unselected tables are removed from the draft
* Existing dataset files remain in place
* Future inclusion rules continue to add matching new assets
Publish a new version when the draft is ready for downstream tools.
## Keep the repo current
As your catalog changes, return to the asset selector to update what the repo tracks.
When you save selection changes:
* Newly selected tables are added to the draft
* Unselected tables are removed from the draft
* Existing dataset files remain in place
* Future inclusion rules continue to add matching new assets
Publish a new version when the draft is ready for downstream tools.